Just because you’re visiting Acadia National Park by yourself doesn’t mean you can’t come back with great selfie pictures. However, you should not waste time in the park fiddling around with your phone trying to figure out how to take a decent picture. We all know the drill.
- Snap.
- No good, cut off half my face.
- Erase.
- Snap.
- No good, I have a weird look on my face.
- Erase.
And so on.
You do not need to be a 15 year old high school student to master this smartphone skill. Forget about duck face poses, makeup tips, etc. We are going to explain how to take a great picture of yourself in the glorious natural surroundings of Acadia. For the purposes of this article, we assume the following:
- You have a smartphone camera
- Using the camera is no problem.
- You may or may not have a tripod or selfie stick to work with.
- While no Instagram model you’d still like to return from Mount Desert Island with some decent photos to share, either online or in print.
- You take pictures but are not professional level photographer.
A Step by Step Guide to Good Acadia Selfies
- Safety First. I cannot stress this enough. Just because you are in a National Park does not mean that no danger exists. Generally speaking, the park is safe but the most impressive Instagram-locations tend to be either beautiful, precarious or a combination of the two. Do not risk your own personal safety to impress your friends on social media. Inside Acadia National Park, stones can be slippery, rocks can give way, etc. People fall and even die in the course of regular park exploration. Taking selfies adds an extra layer of distraction since you are focusing on the camera screen rather than your immediate surroundings. According to a Washington Post article, 259 people died while taking selfies between 2011 and 2017. Additionally, the National Parks Service reports that on average 160 people die each year in national parks. Pick a safe backdrop and pay attention to your surroundings when taking selfies, please.
- Show up off-hours at the most popular park spots. If you want a selfie at Thunder Hole with no one in the background, it’s substantially easier to acquire one during off-peak hours. Plus, it’s less stressful and less stress results in better smiles.
- Pose in an area with good lighting. In Acadia National Park you are going to be using natural lighting and there is plenty of it almost everywhere you look. Just after sunrise and just before sunset are the ideal times for selfie taking. Photographers refer to these intervals as the golden hours. During these times, light is filtered. If the sun is too bright, your camera will fail to distinguish the bright and dark spots well. Basically, your selfie will look washed out. This can happen even with indirect sunlight when the sun’s rays reflect off the ocean. On the other end of the spectrum, once the sunlight level gets too low most smartphone cameras won’t take a good picture, either. They typically do not have the capability to adjust to the low level of lighting. The result is often blurry. This becomes more problematic if you are attempting to hold the camera in one hand for a selfie. If you are not in the golden hours for selfie snapping, look for a spot where your phone will be in soft white light. Generally speaking, you want your camera lens to be pointing away from the sun, not towards it.
- Press the Camera Flip button on your cellphone. To take a selfie, you need to look into the screen while facing the camera. Do this by opening your camera app and pressing the camera flip button.
- Take the selfie in a slightly downward angle. Unless you are going for a fun-house or mugshot look, make sure the camera lens is facing you a slightly downward angle. To clarify, the cellphone should be elevated a few inches above your head. This downward angle creates the most visually appealing selfie photos.

This is textbook selfie technique. - Maximize the distance between yourself and the smartphone camera. There are two ways to do this. First, you can extend your arm as far away from your body as possible. A second option is to use a selfie stick to extend the separation between you and the camera. A third option is to use a tripod and the timer function on your cellphone. This will look more like a picture taken by someone than a selfie but it’s still technically a selfie. Regardless of the method used to create space between you and the lens, it is important. If the camera is too close to your face, you will get a fish eye distortion effect where straight lines appear curved. If your arm is fully extended (or close to it), the fish eye effect should not come into play.
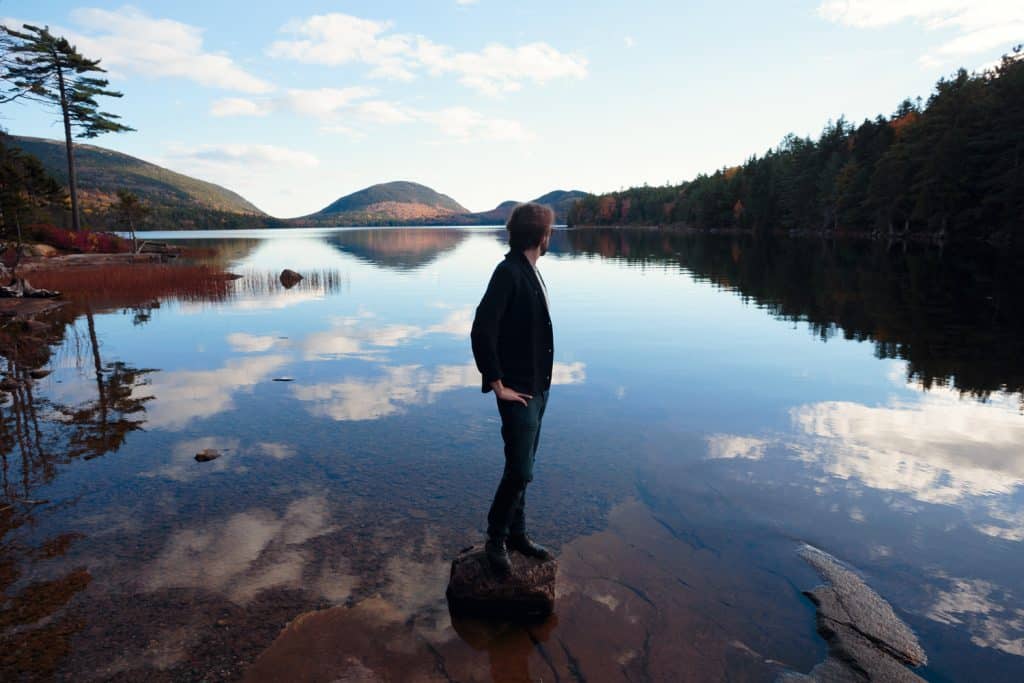
- Decide on the focal point of the picture. Taking selfies presents some logistical challenges. One is that the camera is too close to the photographer to get a great picture of both you and the background. You need to decide ahead of time which to feature. Since you can take a portrait-style selfie from the comfort of your bedroom, my suggestion is to take advantage of the amazing backdrop that is Mount Desert Island. To accentuate the park in your pictures, use only a small but recognizable part of your body or face.
- Use the Selfie Rule of Thirds. This means you want your face to be in one of the top corners of the photograph, occupying 1/3 of the photo area. Resist the urge to position yourself dead center. Stylistically, this is true for all types of photography but it is especially critical for outdoor selfie pictures. There needs to be more than a splash of green in the background otherwise you could just take pictures in your back yard.
- Take a chill pill. Managing the Rule of Thirds, the camera and your own facial expression can be stressful. In my experience, stress is not conducive to photogenic smiles, especially at close range. Take some practice selfies while you’re alone somewhere to help get yourself into the right frame of mind to smile naturally on cue while aiming the camera at your own face. It’s not as easy as you’d think. Also, it’s no fun retaking selfies because of an odd look on your face. After 2-3 attempts, you’ll likely give up and move on regardless of what you’ve captured. It is preferable to work out any smile issues before you’re on site.
- Never mind the onlookers. Acadia National Park is one of the most visited National Parks in the United States. Most visitors come in the summer and head straight over to the most popular photo spots, just like you do. You will likely encounter other park visitors on your adventure. Until you are used to taking selfies, it may feel a bit odd to do in front of other hikers and park attendees. Pretend like no one is there even if a crowd is gathering. If you are even a little concerned about people in your immediate area it could negatively impact your facial expression. Tune everyone out and just do your thing.
- Go to some of the secret park spots for your selfies. If the park crowds are overwhelming or if you already have a dozen pictures of yourself pretending to hold up Bubble Rock, head over to some of the park’s hidden locations. There may only be one Thunder Hole but there is a seeming infinite amount of scenic photo opportunities throughout the park. Ditch the crowds and check out some off-the-beaten path spots. Let your creative juices flow.
- Switch to video in a pinch. If you are really having difficulty snapping good pictures, switch your phone over to video mode instead. Although you’re giving up some resolution, you can isolate individual frames and pull pictures from the clip.

Heidi
6 Mar 2019A new way to look at selfie’s! Interesting, thanks.
Stephen
6 Mar 2019Of course!
Pingback: Where Are the Best Photo Opps in Acadia National Park? - Maine Terrain
Pingback: Is Acadia National Park Open During Winter? - Maine Terrain - 2019
Pingback: 🌄Popovers: Can You Make Them Jordan Pond-Style? - Maine Terrain